This winter it is time to overhaul the saggy suspensionon our car. Now and then the Vette takes over the controll and I want to make clear who’s boss…..
33 years or road abuse leads to worn suspension rubbers. Luckily technology has been improved and polyurethane bushings were invented.
Advantages:
- Less flexible than normal rubber, so more controll of the car
- PU last longer than normal rubber
- Probably more difficult to install, but that I can’t tell you now….
Disadvantages
- More expensive
- Tend to Squeek
Anyway, the list of advantages may be changed as the story continues.
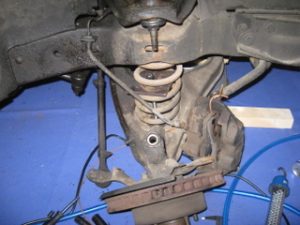
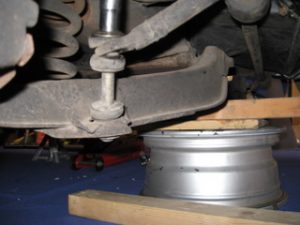
This is a picture of the front A arm of the suspension. Years of grease and roaddirt
are acting as a rust barrier. At least in our case. there is rust but it’s a thin layer.
For christmas I got 4 jacks as a present. these are now very usefull. After jacking up the car, applying the jackstands and removing the wheels het vette has become airborne.
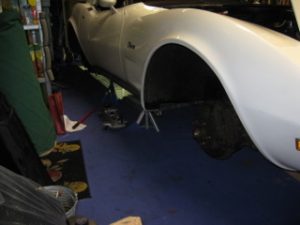
This is the right front end of the car. The splash flaps are gone and there is a lot of oil splattered from the engine. After putting on a nice “mushroom” breather tube, the engine began buildoing up a lot of internal pressure. Due to leaking arround the piston rings maybe. As a result the gasket of the crankshaft to flywheel is probably damaged. So this is in the todo list soon.
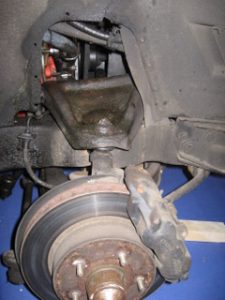
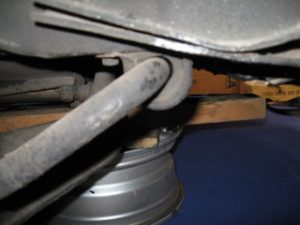
To be shure I’m not crushed like a nut, there is e extra wheel centered under the front crossmember.
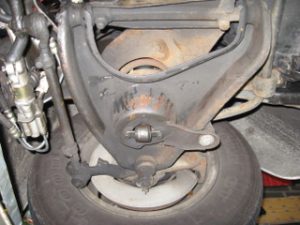
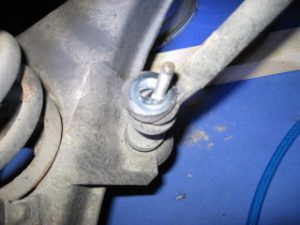
The worn stabilizer bar rubber is clearly visible…
And here as well..
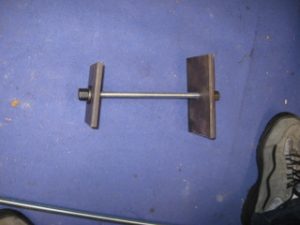
To be able to coompress the spring this tool is used. Be carefull with ist, becouse this system is not locking the plates to prevent them from sliding over the coil wires. The plates are not radial to the thread bar. Therefore I used spherical washers and spherical nuts to take up the missalignment. These things are used to clamp products on a milling machine.
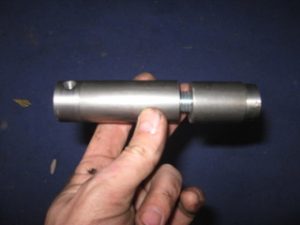
The tool above was practically unusable and dangerous. Therefor I decided to buy the tool below. This tool is inserted inside the spring. Take out the schock absorber first.
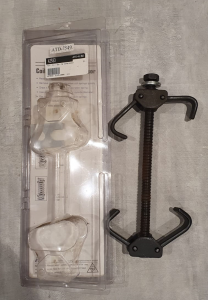
The tool below is made on the lathe. It hat thread inside, by turning it will extend. Maybe this is usefull to loosen the upper balljoint… I’ve got this one out of Haynes.
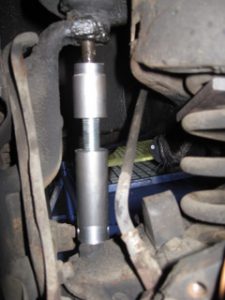
Here the tools are installed. The compressor plate is just visible on the right. After removing the shock absorber the compressor tool can be installed.
The brake calipers needs to be disconnected from the spindle as well. Or you can cut the rubber hose if you are replacing them anyway. Make sure the brake fluid is catched in a container and don’t let it come onto your precious paint..
And then…… it came loosse with a big bang. I didn’t compress the spring enough to make it forceless. Luckily my legs were not underneith. With this knowledge the other side was loosened with a hydraulic jack underneath the brake disk. On this side the balljoint was refusing to come loose, even after encouragement of a hammer. Then I decided to loosen the spring compressor to let the spring do its magic in a hydraulic jack controlled way.